How to beat Venom in Spider-Man 2
Tips, tricks and strategy for taking down this final big boss.
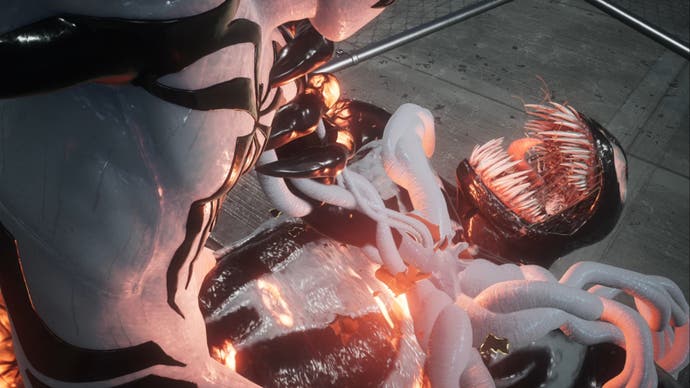
Defeating Venom in Marvel's Spider-Man 2 forces you to use all of the knowledge you've gathered from fighting other bosses throughout the main story. This fight happens across several different phases and environments, you will need to stay on your toes to stay alive long enough to bring the sentient Symbiote down.
This is quite a long fight and Venom has more than a few tricks to throw your way. If you don't feel ready to start this fight when you reach it, then we strongly advise spending more time in the city doing side missions to upgrade your gear first.
If you are ready, then we're here to show you how to beat Venom in Spider-Man 2. Plus, we've listed some handy tips and tricks that are worth knowing before you start the fight.
On this page:
Tips for fighting Venom in Spider-Man 2
Before you embark on your epic battle with the final boss in Spider-Man 2, take a few moments to check out our list of handy tips and tricks that helped us get through it:
- Don't Use Web-Shooters - Venom is immune to your webbing, so don't waste time and make yourself vulnerable by using your Web-Shooters at any point in this fight.
- Keep Moving - The battle area in every phase is generous with its height. Venom moves around a lot, which means you can too. If you need a moment to heal or you need to get away from the onslaught of attacks for a second, you can swing around the area with R2.
- Use Sonic Burst Gadget - All of your gadgets are useful in this fight, but Sonic Burst is the best one to use against Venom. The effect from this gadget won't last as long as it did for other Symbiotes, but it will briefly make Venom vulnerable.
- Use The Environment - In the phases with Peter in particular there are several opportunities to use L1 and R1 to trigger high-frequency noises. Don't forget to use them! Venom is a tough boss, so any and all weaknesses you can exploit should be targeted.
- Heal First, Hit Later - Venom is a long-haul boss fight compared to the others in Spider-Man 2, so the longer you stay alive the faster you will get through it. Always remember to heal first before you go in for a new attack, especially if your own health bar is below half.
- Gadgets, Gadgets, Gadgets - Even Spider-Man needs a rest sometimes, and using your gadgets mid-fight are the perfect way to carve out a window for you to heal in or to reposition yourself for your next attack. We mentioned Sonic Burst already, but we found that Concussion Burst and Upshot were particularly useful in the second phase too.
- Anti-Venom Abilities Hurt - Peter has been through it to get his new Anti-Venom abilities, so use them! There's one part of the fight in particular where the Anti-Venom abilities must be used to beat Venom. However, don't forget to use them throughout the other phases where they're available too as they easily damage the raging Symbiote.
- Save Each Phase - Each time you begin a new phase, we strongly recommend creating a manual save. This saves all of the progress you've made so far, so it's less painful if you do get killed at some point.
- Patience - Like battling The Lizard earlier in the story, this fight isn't about going all in right away. Fighting Venom is all about dodging at the right time, knowing when to parry and then striking at the opportune moment.
- Control The Fight - Venom will instinctively target you and follow you to strike, which means you can lead them towards areas that are better suited to your attacks.
- Change The Difficulty - Remember, as much as you're here to be a hero, you're also here to have fun. If you're finding that the fight is too hard on the setting you're on (or perhaps it's not hard enough), then you can always change the difficulty level in Gameplay Settings.
- Come Back Later - If you find that the fight with Venom is too hard and you don't want to alter the difficulty setting, then we recommend leaving this mission for now to spend more time exploring the city or doing side missions to increase your skills or upgrade your gadgets and suit tech.


How to beat Venom in Spider-Man 2
The fight with Venom in Spider-Man 2 happens in four different phases, with the fight evenly distributed between both Miles and Peter. We've gone through the fight step by step, but if you're stuck on a specific phase then feel free to skip ahead using the links below:
Phase One
As with every other fight you've had so far in Spider-Man 2, the first phase of your battle with Venom will teach you about the majority of the attacks they'll use throughout the four phases. In this phase, you're Peter and you can use your Anti-Venom abilities to hurt the Symbiote.
Here are all of the attacks Venom uses in phase one and how to avoid or counter them:
- Stretch and Slam - Venom stretches their arms forward then slams them down on you, creating a few little tendrils and spikes in the floor. You can parry this attack, press L1 when your Spidey-Sense turns red. If you feel like you can't get the timing right for a parry, then you can dodge instead.
- Fist Slam - Venom stretches one arm forward and slams a large boulder-like fist into the ground to crush you. As with the attack above, you can parry this attack or you can dodge it.
- Claw Swipes - Venom will step towards you with long strides and swipe their claws at you in several fluid motions. You can parry this attack too to a strong counter attack, but it's best to dodge it if you're feeling backed into a corner.
- Jump and Slam - Lines will appear around Venom (similar to your Spidey-Sense) which is a warning they may unleash this attack. Then, they will jump into the air, launch towards you and slam into the ground. Press Circle to dodge this attack - parrying can be risky.
- Grab and Pull - Lines will appear around Venom (similar to your Spidey-Sense) which is a warning they may unleash this attack. Venom will stretch a tendril arm out to you. If it gets you, it will crush you. You should dodge this one and attack in the short window between this attack and the next one.
- Double Crush Slam - Venom lifts both arms into the air just before releasing this attack, then slams them down while stretching them out to try to crush you. You can parry this attack if you time it right, but you can dodge if you're not sure.
- Symbiote Floor - This is a dangerous attack. Venom will jump into the air then slam down, sending Symbiote shockwaves out around him. The shockwave will start to cover the entire floor of the area you're in. To get away from this safely you need to use L2 and R2 to zip up to a level higher than the ground, then swing across to one of the other two platforms nearby.
Venom will constantly use the attacks listed above and it's your job to use all of the knowledge you've collected on these attacks to use them to your advantage. One of the most important things to remember is that you must change platforms once Venom sends out that Symbiote Shockwave across the floor - you cannot stay in the afflicted area.

Then, the only other thing to remember right now is to continuously parry, dodge and counter the incoming attacks (as well as throwing in a few of your own) to wear the Symbiote's health bar down to zero. Once it reaches this point, you'll enter Phase Two.
Phase Two
Venom only has one new trick up their sleeve for the second phase of the fight. That being said, you still need to be on your toes as they will recycle all of the attacks they previously used.
Here's the new attack Venom uses and what you need to do to stop it:
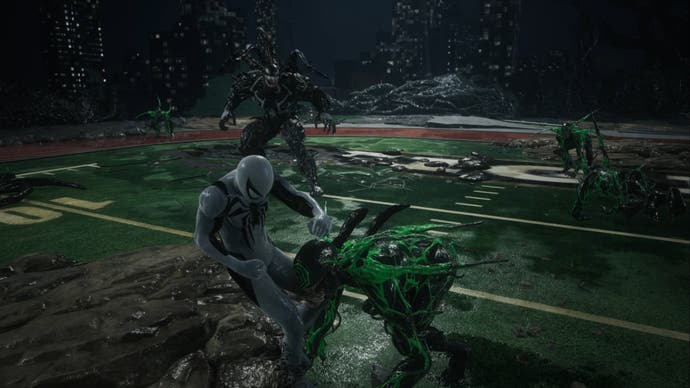
- Symbiote Guards - Venom will get a cover over their health bar at the top of the screen and call on several other Symbiotes to invade the battle area. You need to clear the area of these Symbiotes while also making sure that you're dodging Venom's own attacks. Do not use any Anti-Venom abilities on the smaller Symbiotes if you can help it. This is because the smaller ones are here to help you charge the Anti-Venom abilities to use against Venom. Only the Anti-Venom attacks will break down the cover on Venom's health bar.
Continuously use Peter's Anti-Venom attacks on Venom once they're charged and you'll chip away at the cover on their health bar. Once you remove the cover on the health bar, Venom will temporarily be weakened and you can unleash a flurry of melee attacks on them.
Once you've brought Venom's health bar down to zero again, the fight will enter its third phase and you'll also have a change of scenery.

Phase Three
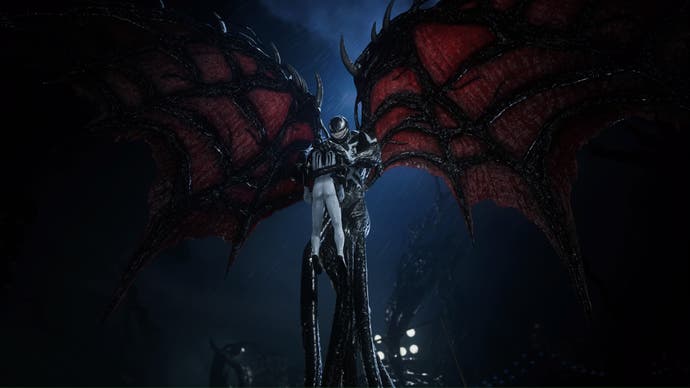
Ta-da! You're now fighting as Miles and, uhm, Venom has also sprouted wings. With their newly grown wings, Venom also has an entirely new set of attacks that you need to learn about and decide whether or not you want to parry or dodge them.
Here are all of the attacks Venom uses in phase three and how to avoid or counter them:
- Projectile Attack - Venom seems to love this attack. While in the air, they will throw several projectiles at you. Dodge the first few, but there will be one where Venom charges up a bit before throwing it at you. A prompt to hold L1 and R1 should also appear at the same time as this projectile. As soon as you see this prompt, do it as you will then send the projectile back to Venom. This significantly hurts the Symbiote and briefly dazes them, leaving them open for a follow up attack.
- Grab and Fly - While in the air, Venom will fly towards you with their arm out and try to grab you. Use Circle to dodge this attack.
- Arm Extend - Even while in the air, Venom likes to use this trick. They will extend their arm out to you to try to hit you with it. Again, we recommend dodging this but you can parry it if you're feeling brave.
While Venom is in the air you can use L2 and R2 to zip over to them, then you can repeatedly attack them with your melee attacks or your abilities. We found that Miles' chain lightning ability and Venom Punch really worked well here. Also, doing this opens the possibility for you to do use Web Strike too.

After you've beaten their health bar down, Venom will lose their wings and be grounded. For us, this happened when Venom's health dipped below half. We only noticed one new attack at this point:
- Double Swing - Lines (like your Spidey-Sense) will appear around Venom as a warning for this attack. They will then extend both arms out like tendrils then swing them across each other to try to whip you with them. We found it best to dodge this and launch one of Miles' Venom or Lightning abilities in retaliation.
Once Venom has been grounded, they will use the same attacks that they used in the fight with Peter alongside their new one. However, the Symbiote Floor was nowhere to be seen (which is a bit of good news). As you did with Peter you need to dodge or parry the incoming attacks while mixing in your own ones to bring Venom's health bar down to zero.
Once you do this, you will enter the final phase of your fight with the sentient Symbiote.

Phase Four
This part of the fight is where everything you've learnt so far will need to be used.
Also, you will need to use L1 and R1 to pull out the Oscorp branded barrels stuck in the Symbiote goo around you. Pull them out and then launch them at Venom to daze them. They will briefly be vulnerable when you do this, and this opens a window for you to unleash several powerful attacks in a row.
Venom had one brand new ground attack in this phase. Here's a brief description of it and how to avoid it:
- Floor Waves - Venom will send out waves of Symbiote Tendrils into the floor around them, they move like snakes across the ground. Zip yourself to a higher level in the EMF to avoid being hit by it.

After taking a few hits, Venom will sprout wings again. However, when we fought them, they only displayed one new aerial attack:
- Cluster Projectiles - While in the air, Venom will throw several clusters of projectiles at you. They're very precise and can track you, so keep moving around the area to avoid them.
Now, you need to gather all of your knowledge from the rest of the game (not just this fight) and use it to bring Venom down. Dodge, Parry, Counter, and fight with everything you've got left to bring the Symbiote's health bar down to zero. Once you do this, sit back and watch the aftermath...
Congratulations! You now have completed the main story for Spider-Man 2, but there could still be plenty left for you to do. If you're yet to get collectibles or are trophy hunting, head to our walkthrough hub to browse the rest of our guides for your web-slinging adventure.


