Metal Gear Solid 5 - Occupation Forces: Colonel and tanks explained, Smasei fort
How to find and steal the deployment plans, kill the colonel, and handle the tank threat in Metal Gear Solid 5's Occupation Forces mission.
Welcome to Metal Gear Solid 5 - Occupation Forces, the eigth main story mission of the game, following on from Red Brass.
Occupation Forces Mission checklist:
- Secured the deployment plans
- Eliminated the colonel
- Eliminated all the tanks
- Extracted the colonel
- Eliminated the colonel and all tanks before they reached Smasei fort
- Extracted the prisoners being held at Sakhra Ee Village
- Extracted all tanks
When you're ready to begin a new objective, activate 8-Occupation Forces from your mission list and select the Landing Zone to the north-east of Darya Sakhra Ee. Next, adjust your load-out as required, set the drop time to 0600 and commence the operation.
There are two parts to your mission this time around: firstly, you need to eliminate the colonel scheduled to take up a post at Sakhra Ee village (and secure his deployment plans). Next, you need to stop the Soviet tanks from being deployed.
Occupation Forces: Make your way to the village and infiltrate it
As soon as you land, Ocelot notes that you'll need to have developed explosive weapons such as missiles, grenades and C4 in order to take out any combat vehicles you encounter during the mission. If you haven't done so already, open your iDroid, develop the FAKEL-46 grenade launcher and have it dropped to your current location before proceeding.
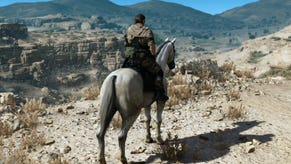
When you're ready to continue, hop onto your horse and begin heading toward the yellow objective marker, working your way down to the road below. Before long, you'll spy the village of Sakhra Ee sprawling up the mountainside ahead. Come to a halt, activate your binoculars and begin marking any hostiles and sentries in the area.
Next, dismount your horse and cross to the southern side of the main road. Climb the small incline and continue forward until you reach the sheer rock face. Immediately lie prone and start moving south-west toward the village, keeping the rock face close to your left-hand side.
Stay low, using the tall grass as additional cover, and continue moving up the hill. The path grows rockier as you ascend, leading toward a building at highest point of the village.
Keep close to the rocks on your left and press onward until the sheer wall ahead prevents further progress. Next, look for the slope leading down to the right. Proceed cautiously along it, watching out for soldiers patrolling the area nearby. When it's safe to continue, drop off the ledge and onto the wooden walkway leading around the building below.
Locate the plans and reach the deployed tanks
Stay prone and carefully work your way along the walkway, crawling toward the wooden ramp ahead. As you near the ramp, slow down and glance upward to scan the walkway above for guards. When the coast is clear, carefully cross on over to the other side.
Next, locate the rock ledge immediately to your left and climb on up. Scale the narrow incline and follow it around to the right. At the top, continue forward, moving between the building on your right and the sheer rock wall to your left.
At the end of the path, take a right and climb onto the wooden walkway. Follow the walkway clockwise around the building and leap through the green window on the right once you reach it. Inside, on the desk at the end of the room, you'll find the deployment intel you need. Scan the documents in order to add the tank routes to your iDroid.
When you're ready to continue, climb back out of the window and take a left. Descend the steps to the left at the far end of the walkway and continue down the slope, moving past the building to your right. Next, wind north-west down the dirt track until you rejoin the main road at the bottom.
If you didn't dawdle too long in the village, the tanks (and the colonel) that you've been tasked with eliminating should still be situated to the north-west, slowly winding their way along the road toward you. If so, it's possible to complete your mission here and now.
All you need do is use your grenade launcher to destroy the tanks (this might take a few hits), then deal with the colonel in the jeep. Be warned however: the tanks will quickly retaliate and both can do some serious damage. Note that you'll need to destroy the tanks before they reach the base at the end of their route and use your Fulton to extract the colonel in order to complete two of the mission's hidden objectives.
If you dither too long in the village after you've found the deployment intel, your targets will likely be well on their way to Da Smasei Laman fort in the south-east by the time you reach the main road. Should this be the case, you'll need to tail the tanks and finish them off once they reach their final destination - a far more difficult task.
Mount your horse and begin travelling south-east along the main road. When the first Soviet outpost comes into view, leave the road and join the path to the right. If you hug the rock wall, you'll be able to circumvent the guard post completely.
Keep an eye out for the driveable missile launcher at the far end of the outpost, however. It packs some tremendous firepower and can be extremely useful during the mission's final showdown. If that sounds appealing, hop onboard and resume your journey south-east along the main road.
While you descend the hillside, the Soviet tanks will begin their journey toward Da Smasei Laman fort to the south-east. Carefully make your way along the main road (using the tall grass as cover) then mount your horse once you've successfully passed the village to your right.
If you're quick, it's possible to catch up with the tanks en route to the fort and bring them down with a couple of shots from your grenade launcher. However, numerous guard posts lie between you and the tanks' destination - so destroying them in transit isn't always easy. For the purposes of this walkthrough, we'll tackle the tanks once they've reached their destination.
Start by heading south-east along the main road and, once the first Soviet outpost comes into view, leave the road and join the path to the right. If you hug the rock wall, you'll be able to circumvent the guard post completely - although do keep a look out for stray patrols.
Avoid the guard posts and reach Smasei fort
Eventually, you'll reach a sharp bend concealing another Soviet guard post. Before you round the corner, look to the left and locate the path leading up the nearby hillside. This takes you over the rocks, enabling you to bypass the guard post undetected.
Follow the path until you're back on the main road then continue forward. Slow down and locate the narrow pathway leading between the rocks on your left. If you're on your horse, head down the path immediately. If you're driving the missile launcher, however, make a note of the path and continue forward along the road until you spot the tunnel leading into the camp on the right. Cautiously drive along the tunnel, park up inside and return to the path you noted earlier.
When you're ready to continue, wind along the pathway between the rocks until you reach the ledge at the end. You'll find yourself overlooking the clearing where you fought the Skulls earlier in the game. If you didn't overtake the tanks on your travels, both vehicles (and the colonel) should already have reached their destination below.
Once the tanks arrive, they'll park up and the colonel will begin roaming the area. Use your binoculars to scan the clearing for additional hostiles then dismount your horse. Finally, drop down off the ledge and lie prone when you reach the ground.
Your first task is to locate the colonel and eliminate him before he manages to leave the area via the tunnel to the south. Crawl over to his position, using the tall grass as cover, then put a tranquilliser dart in his head when he's in range. Once he slumps to the ground, Fulton him out of the area then turn your attention to the stationary tanks.
There are a number of ways to deal with the tanks. The most direct approach - rampaging through the compound and using your grenade launcher to take the vehicles out - is easily the most dangerous, given the proliferation of enemies in the area. What's more, once you're spotted, the tanks will activate, meaning that you'll need to deal with incoming bullets and mortar fire.
Unsurprisingly then, it's best to take your time and pick off enemies one by one before dealing with the tanks. Start working your way clockwise around the clearing and eliminate hostiles as you reach them. Be sure to keep an eye on the watchtower in the centre of the clearing - if it's occupied, quickly bring down the guard in order to reduce your chances of being spotted.
Need help with The Phantom Pain? Our Metal Gear Solid 5 guide and walkthrough explains how to complete every main story mission, and explains their many optional objectives. We also have lists of Blueprint locations, Tape locations, Key Item locations, how to unlock S Ranks and a Metal Gear Solid 5 Achievement and Trophy list.
Destroy the tanks
Once the fort is clear of hostiles, it's safe to focus on the two tanks. If you parked the missile launcher in the tunnel earlier, you can use it to demolish the tank closest to the southern end of the encampment - you'll need to work fast, however, as your targets will immediately open fire. You should be able to destroy the first tank easily - and will likely be able to land a few good shots on the tank further to the north before your missile launcher is damaged beyond repair.
If you aren't able to destroy both tanks with the missile launcher, you'll need to work your way over to the second target and eliminate it up close using C4, your grenade launcher or something similar. You'll also be able to Fulton the tank out of the area if the device is sufficiently upgraded.
When both tanks have been eliminated, you need to leave the hot zone. If you wiped out all the enemies in the area, you can summon your horse and canter out at your own leisure. Otherwise, your best bet is to leg it toward the tunnel at the southern edge of the clearing and out into the desert on the other side. Once here, summon your horse and gallop as far away as possible.
Once you've escaped the hot zone, the mission will come to a close. You'll be informed that a new Combat Unit has been established, enabling you to engage in Dispatch Missions - that is, send mercenaries out into the field in order to raise additional funds. Ocelot will also set up the Sickbay, so that returning units can be healed on their arrival at Mother Base. As a bonus, you'll earn the "Do it (defecate)" command, which lets you order your horse to poop on a whim. Hoorah!
After the debriefing, Ocelot reveals that a crack sniper (known as "Quiet") is loose in the area. From this point on, you'll need to watch your step as you travel through the desert. For now though, summon a chopper for pick-up then board it to return to the air.
- Our walkthrough continues with a step-by-step guide to completing Backup, Back Down in MGS 5.
- Return to the index page for more entries in our Metal Gear Solid 5 walkthrough.


