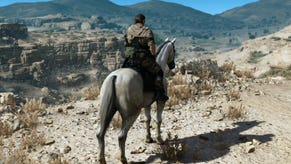
Metal Gear Solid 5 - Angel with Broken Wings: Malak location at Lamar Khaate Palace
How to extract Malak and the other prisoners in the Angel with Broken Wings mission of Metal Gear Solid 5.
Welcome to Metal Gear Solid 5 - Angel with Broken Wings, the 10th main story mission of the game, following on from Backup Back Down.
Angel with Broken Wings Mission checklist:
- Extracted the Mujahiddeen Prisoner called Malak
- Extracted the escort vehicle (armoured vehicle)
- Extracted three prisoners being held at Lamar Khaate Palace
- Extracted two prisoners being held at Yakho Oboo Supply Outpost
- Listened to the last conversation between the transport truck driver and Malak
This time around, your job is to extract Malak, the Mujahideen prisoner who's being held at Lamar Kaate Palace. Select the mission 'Angel with Broken Wings' from your list then choose the Landing Zone just south-east of the palace. Next, adjust your load-out as required, set the Drop Time to 0600 and commence the operation.
Once you touch down, mount your horse and begin the journey north-west toward the palace. As Ocelot notes, you'll gain additional rewards for every prisoner that you rescue during your mission - so keep your eyes peeled as you go about your business.
Angel with Broken Wings: Malak location at Lamar Khaate Palace
As soon as you spot the ruined palace ahead, come to a halt and activate your binoculars. Scan the area for hostiles, then locate the jeep parked up on the right-hand side of the main road leading up toward the building. Malak, your target for this mission, is slumped in the back seat - be sure to scan him in order to add his location your map.
Once you do, the nearby guards will start conversing, revealing their plans to escort the prisoner to the supply outpost in the north. However, it seems that the remaining prisoners at the palace will be executed shortly. Your decision, then, is whether you want to concentrate solely on rescuing your main target or if you want to infiltrate the palace and save the other prisoners too.
Unsurprisingly, the quickest, easiest way to complete your main objective is to chase after Malak and rescue him from the jeep before it reaches the supply outpost. If you choose to save the prisoners at the palace first, however, you'll need to infiltrate the heavily-guarded outpost in the north to liberate your main target - a much tougher task.
Find and rescue the prisoners
If you decide to rescue the other prisoners, dismount your horse and begin approaching the ruined building. There's a sheer rock face to the left that forms part of a natural perimeter running all the way around the palace. Stick close to the rock and follow it along until you reach the building's left-hand side. This should keep you well away from patrolling guards - but stay vigilant, just in case.
As you near the left-hand side of the building, lie prone and proceed carefully, using the long grass as cover. There are several guards patrolling the palace's upper levels so you'll want to avoid their gaze. When the coast is clear, locate the nearest window on the ground floor and hop on through.
Inside, take a left and begin heading north, sneaking through the darkness. Once the corridor ends and you emerge back out in the open, deal with any hostiles in the area then explore the blue cabins to the north. You'll find all sorts of goodies inside, including some handy intel in the eastern-most blue cabin. Once you've grabbed it, head back into the open air.
Next, locate the two black, container-like prison cells in the middle of the area. There's a prisoner in the eastern-most cell, so pick the lock, carry him outside and Fulton him to safety. Finally, examine the red and white shipping container along the northern-most wall of the ruined palace.
When you're done, retrace your steps and return to the shadowy corridor from earlier. Note that the entire building and surrounding land is teeming with hostiles so you'll need to proceed cautiously.
Almost immediately, you'll spot a flight of steps to your left. Head on up to the second landing and take a left at the top. Move into the next room and snag the blueprints from the table, dealing with any guards that you encounter on the way.
There are two more prisoners to rescue inside the guard-infested palace so keep exploring (following their cries) until you find them. Don't dally, however: as time passes, more prisoners will be executed - speed is of the essence if you want to save them all.
Reach and infiltrate the supply outpost
When you've located all three prisoners at the palace (or you've been spotted and can't be bothered dealing with the fallout), make your way back outside onto the main road. Mount your horse and begin journeying north, heading toward the supply outpost and your main target. Shortly, you'll reach a Soviet guard post, so approach cautiously and ride around it to continue.
As you close in on the supply outpost, be sure to keep watch for enemy patrols - and take them out quickly to prevent them from alerting their colleagues in the main compound.
Once the supply outpost comes into view, look for the watchtower at the side of the road. Just before it, you'll spot a small road leading east away from the main path. Head a short distance along the eastern path then dismount your horse.
Next, drop down into the large body of water on the left-hand side. Follow the water rushing east and look for the small concrete slope on the left, just before the large waterfall. Climb the incline and pull yourself up onto the rock ledge. Continue east a short distance until you join another main road heading north.
From here, follow the road north until you reach the concrete wall to your right. The supply outpost lies directly ahead so break out your binoculars again and scan the area for enemies. Next, lie prone and resume your journey north, sticking close to the wall.
Once you reach the end of the wall, take a right, keeping close to the rocks. There's a little encampment just ahead that provides handy cover from the guards patrolling the area. Move between the rocks and the tarpaulin until you rejoin the main road again.
Continue north along the main road, travelling past the large sign to the left. Just before the road bends sharply to the right, heading north-east, you'll spot a gentle incline on the left-hand side of the road. Climb the slope and follow the path as it moves south-west between the rocks.
Eventually, the path opens out and you'll reach a high ledge overlooking the entire supply outpost. Glance left and locate small hut with a comms dish on its roof. Approach the hut and drop down onto the surrounding walkway; this puts you right on top of the outpost's huge perimeter wall.
From here, make your way south-west, moving along the top of the wall. Unsurprisingly, there are numerous enemies patrolling the area so proceed cautiously. If you're spotted, your best bet is to grab an offensive weapon and plough through as many guards as possible. It'll be mayhem, but at least you can put your high vantage point to good use.
Locate Malak's prison cell and escape the supply outpost
On the far side of the perimeter wall, slip into the small corner hut and get your bearings. When you're ready to continue. head along the wall to the south-east and look for the hole in the floor on your left. Climb down the ladder and locate the door directly opposite.
Pass on through then immediately take down the guard inside. Before continuing, grab his weapon if you currently lack decent firepower - it'll come in handy shortly. Next, swipe the blueprint from the table in the centre of the room. Once you're done, head back out into the corridor and enter the room directly ahead. You'll find your main target on the ground inside - and possibly a guard interrogating him, so deal with the latter swiftly if need be. When the coast is clear, hoist Malak onto your shoulders and prepare to make your escape. Sadly, it's likely that Malak's injuries will be too grave to Fulton him out of the area safely. Instead, you'll need to carry him out of the compound and get him onboard a chopper. Unfortunately, with so many guards patrolling the area, this isn't going to be easy.
Start by returning to the previous corridor. In theory, it's possible to sneak through the door to the left of the ladder, slip across the courtyard and pass through the large gate in the left-hand wall without being detected. If you manage to get through the gate (and beyond the perimeter wall), you simply need to climb the path ahead, summon a chopper and carry your charge to safety.
In all likelihood though, you'll need to fight your way through the hostiles in the area first. If you take this more aggressive route, your best strategy is to remain in the ladder room (make sure you drop Malak in a safe corner before you start) and deal with enemies as they flood on in.
To begin the battle, rap on the courtyard door to alert any nearby enemies to your position. You'll find the corridor easy to defend provided that you keep an eye on all access points - just empty a few rounds into guards as they burst in through the doors or descend the ladder to reach you. If you start to get low on ammo, simply do a sweep of the room to gather dropped supplies.
Need help with The Phantom Pain? Our Metal Gear Solid 5 guide and walkthrough explains how to complete every main story mission, and explains their many optional objectives. We also have lists of Blueprint locations, Tape locations, Key Item locations, how to unlock S Ranks and a Metal Gear Solid 5 Achievement and Trophy list.
Summon a chopper and extract the prisoner
When all hostiles are down, scoop up the prisoner and head out into the courtyard. Look for the gate in the perimeter wall to the left and speed on through. Next, climb the steep path leading up the hillside opposite the gate and pause once you reach level ground.
Immediately summon a support helicopter for pick-up and race over to its destination. On arrival, drop Malak inside and hop in after him. Once you're back in the air and the mission is over, you'll automatically return to Mother Base.
When you're ready to tackle a new objective (having learned all about boosting staff morale), climb back into your chopper. This time around, DD will come along for the ride!
- If you're after help dealing with Quiet, head to the next part of our walkthrough that details Cloaked in Silence.
- Return to the index page for more entries in our Metal Gear Solid 5 walkthrough.


