How to build an Outpost in Starfield
Plus, how to place an Outpost Beacon.
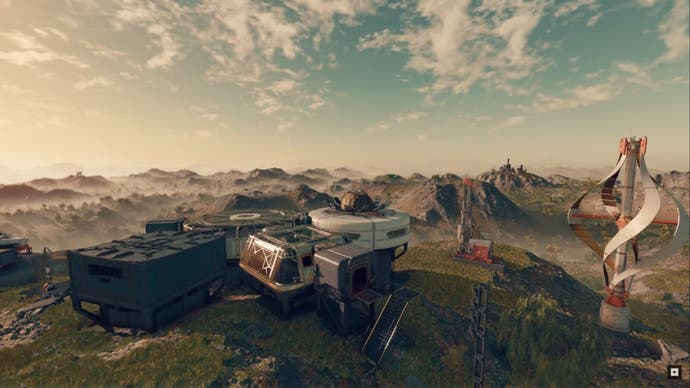
An Outpost in Starfield is essentially your base camp on any planet of your choice. You can build your Outpost however you want to, you can customise it, add to it or take things away from it to suit your needs. If you want one solely for farming resources on a rich planet, then you can build an Outpost for that, or if you want somewhere to kick back and relax after a long mission, you can make one for that too.
There are several stages to building an Outpost in Starfield but, fortunately, it will only cost you resources to create them. Your hard earned Credits can safely stay in your pocket for this. Also, you can fast travel to any Outpost you make, so there are very few reasons to not build one!
Without further ado, here's a basic rundown of how to build an Outpost in Starfield.
On this page:
If you’d like more help in your galactic adventures, visit our Starfield guides, tips and tricks page.
How to choose a Planet for your Outpost in Starfield
The first thing you need to do is find a planet you want to put your Outpost on! For your first Outpost building experiment, we recommend sticking to an easy planet with a calm atmosphere like Nesoi in the Olympus System (where your Dream Home is if you have that trait) or on Akila in the Cheyenne System.
Also, when picking somewhere to build your Outpost, think about the resources available on that planet. Are there multiple resources that you can easily harvest? Is it somewhere you can make use of in the long run?
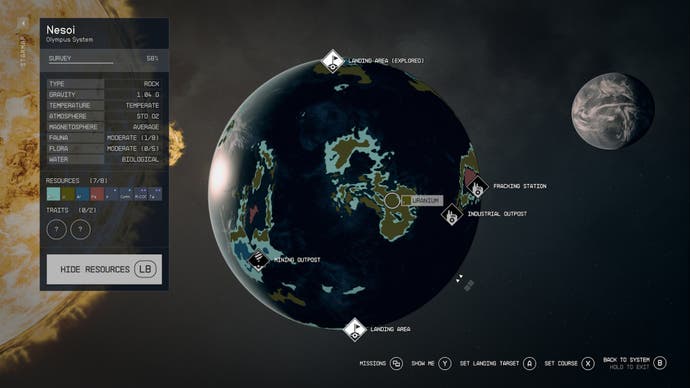
Ultimately, the choice is yours, but you can only have a limited number of Outposts in the Galaxy. That being said, you can delete an Outpost to make room for another one on a different planet, so you can experiment. Or, if you want to keep it simple, you can also just check-out our guide to the best outpost locations.
Once you have figured out where you want to place an Outpost, you can start by putting down an Outpost Beacon.
How to place an Outpost Beacon in Starfield
To start to build an Outpost in Starfield, you need to place down an Outpost Beacon. You can do this on any habitable planet that you want to live on but if you have the 'Planetary Habitation' skill, you can build Outposts on planets that have more extreme environments.
To place down your Outpost Beacon, you need to open up your Scanner. Then, in the command bar at the bottom of your scanner you should see a control prompt for 'Outpost' (on Xbox this is 'X'). Use this command prompt to enter your Outpost Builder.
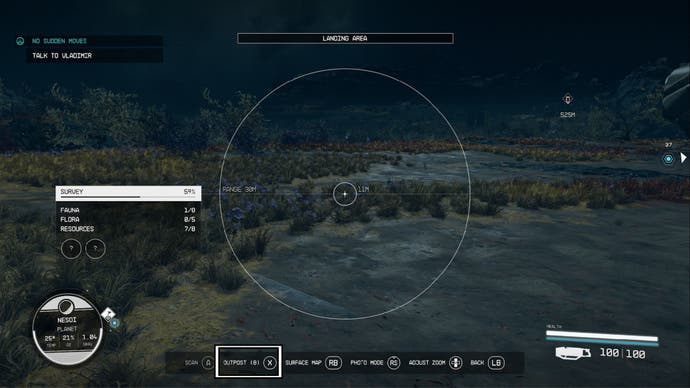
Now, you will be able to place down your Outpost Beacon wherever you want to. This will mark out the area where your Outpost will be on the planet - and this is how you can Fast Travel to your Outpost in future.
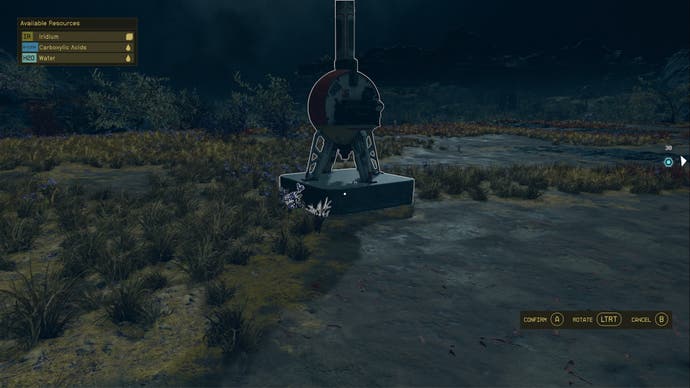
Simply move the beacon to where you want it to be and confirm that it's where you want it to be. After placing down your beacon, you can begin to place down modules.
How to place a Module in your Outpost in Starfield
In your Outpost you can build several different types of Modules, each with their own functions and qualities. There is a limit to the amount of modules/items you can have in your Outpost. In the bottom left corner of your screen you can see a 'Build Limit' bar. This bar will gradually fill up each time you add something to your Outpost. Once it's full, you cannot add any more.
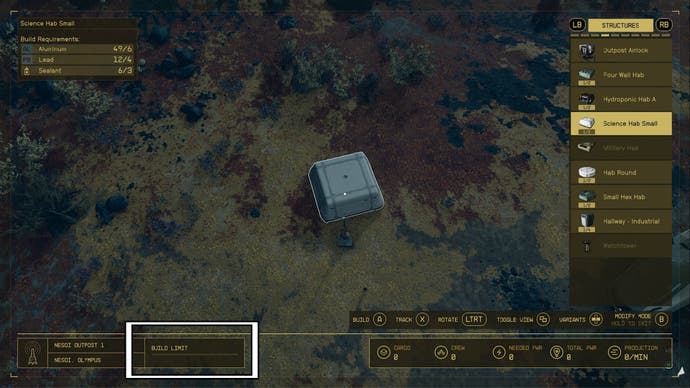
Here's a list of all of the module types you can have in your Outpost:
- Habs - Build for shelter, you can decorate and furnish them.
- Defenses - These will defend your Outposts from attackers.
- Extractors - These can mine and create resources.
- Robots - Are similar to having human crew members on site.
- Crafting - These are crafting stations, such as Cooking Stations and Space Suit Workbenches.
- Power - These modules will power other items in your Outpost.
- Builders - They can make a variety of items for you if you have the right resources.
In the building screen, you can look through all of the options for building modules and items in your Outpost on the inventory panel on the right side of your screen.
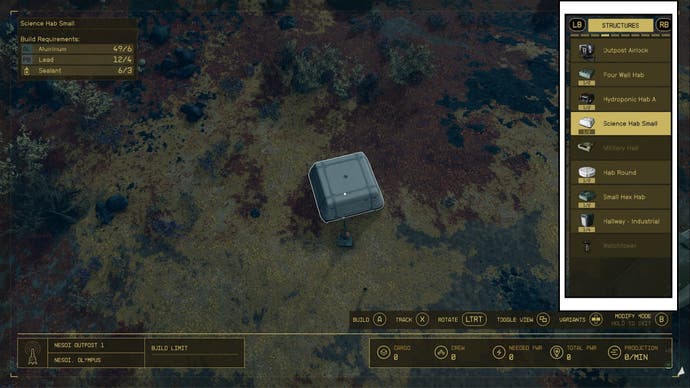
Here, modules and items are split into different categories:
- Storage
- Structures
- Crafting
- Defenses
- Furniture
- Decorations
- Displays
- Misc.
- Extractors
- Power
To place down a module or item in your Outpost, you need to have the correct amount of resources to build it. Items that can be built will be coloured in in the inventory menu, ones that you cannot build as you don't have enough resources will be faded out of the menu.
Resources for building an item will be automatically pulled from your inventory and from your ship's cargo, so you don't have to worry about carrying it.
To see which resources an item or module needs and if it needs to be powered, hover over it in the inventory menu and its resource requirement will appear in a box in the top left corner of the screen.
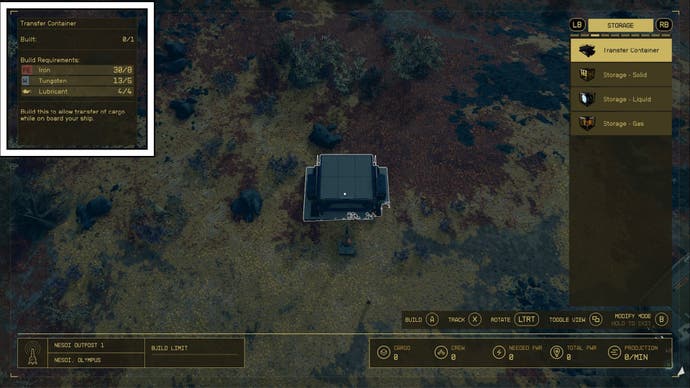
When you have enough resources for your desired item, select it from the menu and then move it around your Outpost area. When you're satisfied with its placement, simply use the prompted control at the bottom of the screen to place it down.
If you can't place a module or item down, it will turn red and small notification will appear at the bottom of your screen telling you why you can't currently do this.
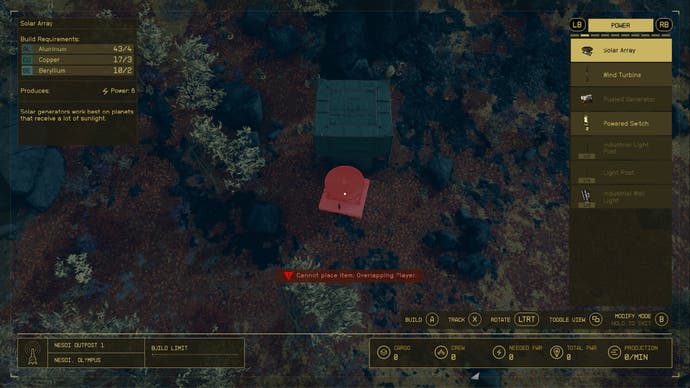
Your Outpost overview
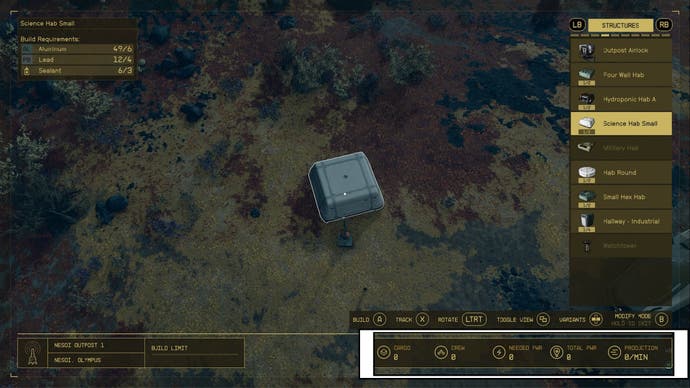
After placing modules down, you can see an overview of your Outpost statistics in the bottom right corner of your screen.
Here, you can see details on your Outpost's:
- Cargo
- Crew
- Needed Power
- Total Power
- Production
You can use these details to determine if you want to continue customising your Outpost or if you are happy with it the way it is.
Changing your Point Of View
Changing your perspective, or point of view, while building your Outpost and placing modules down can make the process easier. There are two perspectives you can use in this mode, the first one being the first person point of view that you start building with.
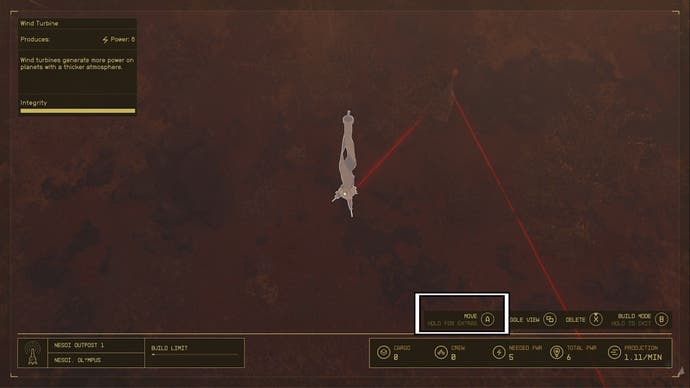
To switch viewpoints while building your Outpost in Starfield, look at the command prompt bar in the bottom right corner of your screen while in Outpost building mode. Here, you should find the control prompt for switching your view. On Xbox, it's the dual-window button.
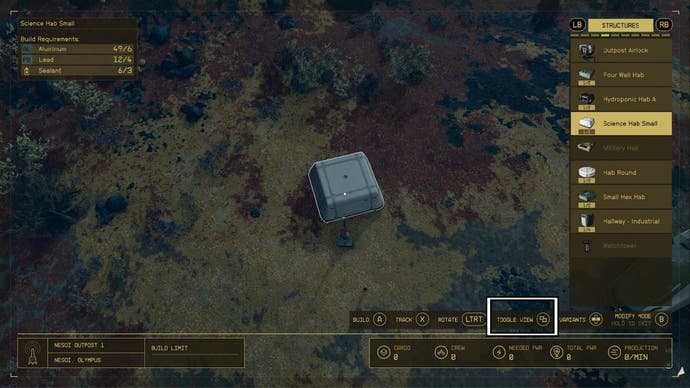
First person view is good for focusing on the small details and getting a feel for the layout of your modules. Also, it can be useful when decorating your modules and for ensuring that you can easily get between different areas of your Outpost.
The 'flycam' is an overhead view of your Outpost building site. This is better suited to creating a larger Outpost or for when you're placing down multiple big modules at the same time. It kind of gives you a blueprint-like view of your Outpost.
How to modify your Outpost in Starfield
After placing a module or item down, you may decide you don't like where it is and this is where modifying your Outpost comes in. To enter 'Modify' mode while building your Outpost in Starfield, make sure you are first in the building menu.
Then, look at the command bar in the bottom right corner of your screen. Here, at the far end, you should see a command prompt. If you're in build mode, it should say 'Modify'. Use the indicated command (on Xbox you need to tap 'B') to switch modes.
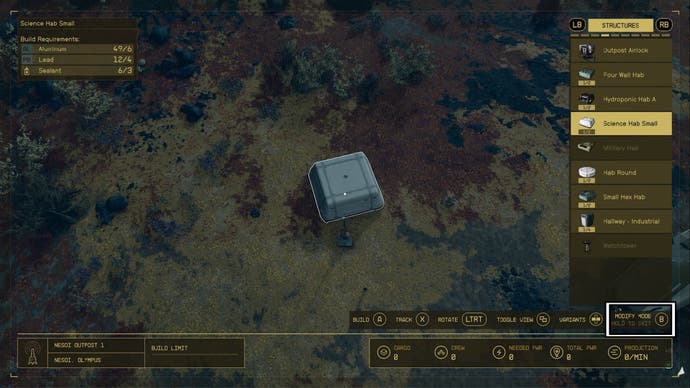
When you're in modify mode, simply click on the module or item you want to adjust and you can then move it, rotate it or delete it.
How to Power your Outpost in Starfield
To power your Outpost in Starfield, you need to build a power source. The type of power source you build will depend on the planet you've chosen to build on and the needs of your Outpost.
For example: The Solar Array won't be any good on a planet that spends most of its time in the dark.
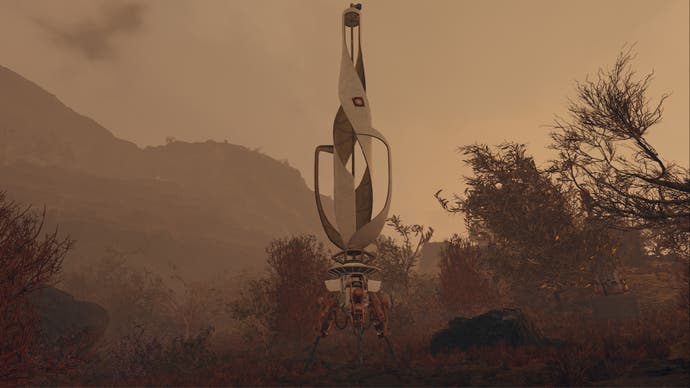
When you're selecting your power source in the Outpost Building menu, details of the power source will be displayed in the top left corner of the screen. Here, you can see the power output of the source, a description on where it's going to be the most useful, and if it has a running cost such as He3.
The good news is that once you have built a power source, it will wirelessly power anything in your Outpost that's close by until it hits its output limit. You may need to build more than one power source depending on how many parts of your Outpost need powering.
How to wire a Power Source to a module in your Outpost
However, if you want to dedicate a power source to powering one specific part of your Outpost, you can directly wire the source to the module.
To wire a power source to an Outpost module, follow these simple steps:
- Walk up to the power source and a small text box will appear.
- Scroll down to find the 'Wire' option.
- Select this, then drag the line to the module you want to connect the source to.
- Confirm, and then you'll have wired the two parts of your Outpost together.
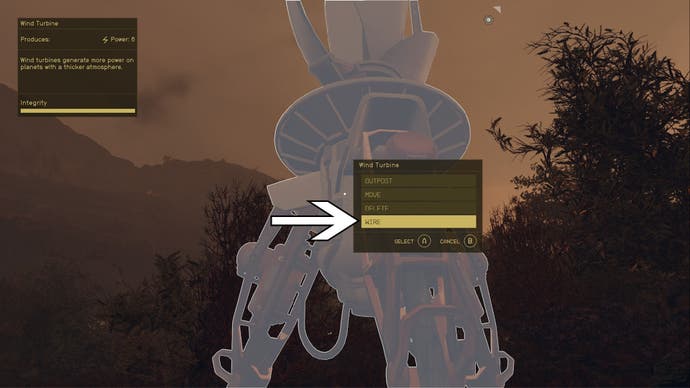
You can also do this in Outpost building mode by entering 'Modify', then selecing the power module and using the prompted control at the bottom of the screen to 'Open Extras'. Then, select the option to to 'Wire' it the same way as listed above.
How to Assign Crew to your Outpost in Starfield
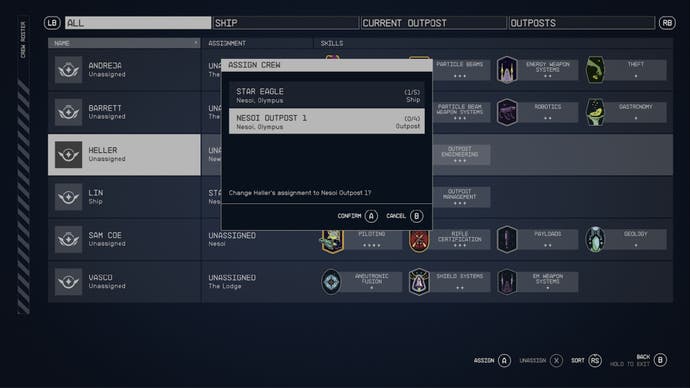
To assign crew and compantions to your Outpost in Starfield, you need to have built a Hab Module for them to reside in and you'll need to build a Crew Station for each entity you want to assign there. For example: Our Outpost has one Hab with two Crew Stations in it so we could host Heller and Lin.
Once you've got the above items built, follow these simple steps to assign crew to your Outpost in Starfield:
- Open your pause menu.
- Select the 'Ship Overview' option in the bottom left corner.
- In this screen, look at the control prompts at the bottom and you should see one for 'Crew'.
- Use this control and you'll open up the Crew menu.
- Here, you can see all of the companions and crew you can assign to your Outpost.
- Select the person you want to assign, then select the Outpost you want to assign them to.
- Confirm your choice and then they will shortly arrive at your Outpost.
That's it for the basics of Outpost building, but there's so much more to it than it first seems. If you're building more of your Outpost, check out our guides explaining Cargo Links and Output Links.
